Wednesday, March 28, 2012

what to do with leftover pumpkin, and other dessert adventures

One of my favorite things about cooking with pumpkin (and buying a big can of pumpkin) is having leftovers to play with. As you'll come to see when the fall rolls around, I love pumpkin and squash, and I love cooking with them. I think pumpkin is such a delicious ingredient, as well as a great one to work with. Pumpkin adds a lot of moistness and flavor to baked goods, and is a great ingredient to add multiple other layers of flavor to. With half a can of pumpkin sitting in my fridge waiting for me, after making the pumpkin bread recipe below, I knew I had to get creative. My boyfriend and his best friend were cooking dinner for a bunch of our friends on Friday night. While the two of them are amazing cooks, they generally stick with the savory. I decided I would take on the sweet, and make dessert for everyone. Often if I bring a dessert to a dinner, I like to have two different desserts. People have different palates, and different likes, and plus- I like to bake, so why wouldn't I make two?

I decided to make a version of a cookie I had made before, and try my hand at a coffee cake as well. Both, I have to say, turned out deliciously. They were a big hit with everyone, and for me as well; I will definitely be making these again. Both I have to say, were made even better by my wonderful gf flour mix (mentioned in the post below). Neither baked any differently, or tasted any differently, than they would if they were made with regular flour- and that is certainly a success. A great website that I draw a lot of inspiration from is Smitten Kitchen, which is where I got the idea for this coffee cake as well (check it out for wonderful recipes, not gf, but easy to adapt)! Definitely try out these recipes, you will not be disappointed.

Pumpkin Oatmeal Chocolate Chip Peanut Butter Chip Cookies

so many delicious flavors, all rolled into one

1 cup canned pumpkin (not pumpkin pie filling!)
3/4 cup granulated sugar
1/4 cup brown sugar
1/2 cup softened, unsalted butter
1 egg, beaten
1 tsp vanilla
1 3/4 cups gf rolled oats
1 1/2 cups gf flour mix (flour+xanthum gum)
1/2 tsp baking soda
1/2 tsp nutmeg
1 tsp cinnamon
1 tsp salt
1 cup bittersweet chocolate chips
1 cup peanut butter chips

Preheat your oven to 375 degrees
In a mixing bowl, sift together the flour, granulated sugar, brown sugar, baking soda, nutmeg, cinnamon, and salt
Add in the butter and mix until the batter starts to crumble
Stir in the egg, vanilla, and pumpkin
Once combined, add the rolled oats, chocolate chips, and peanut butter chips
Mix until just combined
Roll into large balls and place on baking sheets lined with parchment paper- these cookies will not expand a bit, however the size and shape that they are when they go in the oven will remain relatively the same
Bake the cookies for 10 minutes and put on a cooling rack- you might want to snag one of these right out of the oven though!
enjoy!!


Sour Cream Chocolate Chip Coffee Cake

simply delicious.

1/2 cup unsalted butter, at room temperature
1 1/2 cups granulated sugar
3 large eggs, separated
2 tsp vanilla extract
2 cups sour cream (I used low-fat, but either will work)
3 cups gf flour mix (with xanthum gum)
1 tsp baking powder
1 1/2 tsp baking soda
3/4 tsp salt

2 cups dark chocolate chips
1/2 cup granulated sugar
1 tsp cinnamon

Preheat your oven to 350 degrees

In a large mixing bowl, combine the butter and 1 1/2 cups sugar
One at a time, beat in the egg yolks, followed by the vanilla
In a separate bowl, sift together the flour, baking soda, baking powder, and salt
Once combined, alternately add the dry ingredients and sour cream into the butter mixture (starting and ending with dry ingredients)
In a separate bowl, beat the egg whites until they are still, and then fold into the batter
In a small blow, whisk together the sugar and cinnamon for the filling
In a parchment lined 9x9 dish, spread half of the cake batter evenly along the bottom
Sprinkle half of the cinnamon sugar mixture over the batter, and sprinkle with half of the chocolate chips
Repeat these layers again
Once the chocolate chips are sprinkled on, press them lightly into the top of the cake
Bake the cake for 45 minutes
enjoy!

Sunday, March 25, 2012

my new favorite flour, and a secret family recipe


A few weeks ago, one of my mom’s friends (who has been eating gluten free for years) told my mom about her favorite flour blend. For those of you who have tried your hand at gluten free baking, you know that the flour mix is very important. Whether you mix it yourself, or buy it pre-made, most gf flour blends are made of some sort of combo of rice flour, sweet rice flour, potato flour, potato starch, almond flour, xanthum gum, etc. Though many different companies make different flour blends, they can definitely be hit or miss. Some are better when baked into a cake, others when baking bread. Anyways, back to my mom’s weekly mahjong game, her friend told her about a blend that she’s been using for years. It’s called Meisters, and is made by a cute little family in the Midwest. If you live out in Illinois, you can find yourself privy to this wonderful blend at your local health foods store. For those of us though, who live a bit farther away, never fear. You can order off of their website! The 5lb pound of flour is not so expensive, and definitely goes a long way. And I have to say, I’ve now baked with it 4 times, and the results are awesome. The flour really does perfectly mimic regular wheat flour when baked. I’ve made it in brownies, bread, and even cake, and the results are delicious. I highly recommend ordering a bag of this stuff- it will be worth it. If you can’t make the commitment to the 5lb bag, start with something small. But I promise you, if you’re an avid baker like me, this 5lb will inspire you to roll up your sleeves and tie back your apron- you’re going to want the big mama size. Check out their website here- http://www.meistersgf.com/ !

With my new flour ready and waiting to be used in my kitchen, I decided to tackle one of my mom’s greatest recipes of all time. After testing the newbie out, and finding amazing results, I decided that I could take on the holy grail of my mom’s oven, her pumpkin bread. Now, I know what you’re thinking, pumpkin bread? What can be so great. I mean, sure it’s delicious and reminds you of falls as you bite into it, but its nothing so special. Those of you who are thinking this, haven’t been fortunate enough to try my mom’s pumpkin bread. My mom doesn’t bake as much as I do, but those things she make, she makes incredibly well. This pumpkin bread was a standard in the care packages I received at camp and in college, which always put a smile on my face. The bread became so popular, that my mom started baking my friends their own loaves. This bread is sweet without being overly sweet, perfectly cooked, incredibly moist, and full of pumpkin flavor. I’ve missed it so much, that I finally decided I was brave enough to take a gf stab at it. And let me tell you (thank you Meister’s), I was not disappointed. Whether you’re baking gf or not, you must try this recipe. It will seriously change your life. The recipe is easy, and the results delicious. Fortunately, the recipe makes 2 big, or 4 smaller loaves, so sharing won’t be an issue. It also freezes well, so it’s a great make ahead bread. Thanks to my mom for this one- seriously, one of the best of all time.

Pumpkin Bread

 3 ½ cups gf flour mix
2 tsp baking soda
3 cups granulated sugar
1 ½ tsp salt
2 tsp cinnamon
1 tsp nutmeg
1 cup canola oil (or you can sub in 1 cup applesauce for a healthier option)
2/3 cup water
2 cups canned pumpkin (not pumpkin pie filling! Just pumpkin puree)

ready to bake
right from the oven


Preheat your oven to 325 degrees
In a large mixing bowl, sift together flour, baking soda, sugar, slat, cinnamon, and nutmeg
When the dry ingredients are well mixed, add the oil and eggs one at a time with the mixer on. Once incorporated, add the water and pumpkin, and mix well
Be sure that you use a spatula to scrape down the sides and bottom of the bowl, to ensure that everything has been mixed together
Once combined, pour the batter into 2 large (4 small) bread pans, that have been greased lightly with cooking spray
Bake for one hour, or until top starts to brown. Since this bread is thick, be sure to check the center of the cake with a toothpick before taking it out of the oven and letting it rest
You can let it cool inside the pan, and try to resist eating it after it has slightly cooled
Enjoy!!

its just so good.

enjoy!

Tuesday, March 20, 2012

been craving pizza?

Just because I can't eat gluten anymore, does not mean I need to give up pizza. For those of you out there who might be missing that amazingly delicious cheesy first bite of hot pizza, all is not lost. First of all, for those living in New York, there are many yummy delicious places that make gluten free pizza (Those of you who are not in the city- don't be afraid to ask, more places have gf dough these days!). A few of my favorites are from Keste and Slice, however many more are popping up all over the place.

That being said, I also really like making my own pizza. At a delicious local pizza place, Viva, which is across the street from my apartment coincidentally enough, you can not only buy gf pizza, but gf dough as well. They have three different options: chickpea flour dough, cornmeal dough, and brown rice dough. My favorite is the corn meal, which is a bit corny (in a good way), but also tastes similar to regular dough. (In future posts, look out for me being a bit more adventurous and making my own from scratch, but this is pretty yummy for now). Brands that make GF products, such as Bob's Red Mill, also have flour mixes that you can make at home if your local pizza place isn't slinging gf dough these days.

Recently, I've had two double pizza dates with very close friends of mine and my boyfriend. On the first, with one of my old roommates from NYU and her wonderful boyfriend, we made pizza with dough from Viva. On the second, with one of my oldest camp friends (who thank goodness lives in the city now) and her boyfriend, who I love, we got a bit more creative and made a cauliflower crust for our pizza. Both were delicious in their own special, yummy way. I love making pizza with friends- its a great way for everyone to be a little creative, and have fun, while ending up with a delicious outcome. Not a big shocker, but I love lots of herbs and veggies on my pizza. I definitely encourage you to get creative with your pizza, like I did here. Find some good friends, and crank up the oven--it's pizza time.


Summer Squash and Ricotta Salata Pizza & Tomato, Mozzarella, and Herb Pizza


1 large ball of dough, halved (1/2 for this recipe and 1/2 for the recipe below)
1/2 cup tomato sauce
1/2 yellow summer squash, sliced into thin rounds
1/4 yellow pepper, cut into strips
A good sprinkle of rosemary and thyme
1/4 cup ricotta salata cheese
1/4 cup of any good shredded cheese (we used a blend here- asiago, romano, parm, or mozzarella would work!)

pre-oven

ready to eat!

Preheat your oven to 400 degrees
On a cookie sheet that you've sprayed with cooking spray, or other flat baking pan, roll out your dough until it is a 1/4 inch thick
Top dough with tomato sauce spreading around so it forms a thin, even layer on the dough
Sprinkle cheese on top of the sauce
Place squash on top of the dough, and then place the yellow pepper
Sprinkle the rosemary and thyme on top of the veggies
 Put the pizza into the oven for about 10 minutes, depending on how dark you like your crust
Remove from the oven, slice and serve
enjoy!


1 large ball of dough, halved (1/2 for this recipe and 1/2 for the recipe above)
1/2 cup tomato sauce
One large ball of fresh mozzarella cheese, sliced into 1/4 inch thin rounds
two large tomatoes (heirloom or beefsteak work nicely, but whatever you have that is fresh will work here!
1/3 a cup of mushrooms, sliced
Thyme, Rosemary, Basil, Oregano (fresh or dried) to taste
1/4 tsp garlic powder
2 tbsp Parmesan cheese


delicious.
Preheat your oven to 400 degrees
On a cookie sheet that you've sprayed with cooking spray, or other flat baking pan, roll out your dough until it is a 1/4 inch thick
Top dough with tomato sauce spreading around so it forms a thin, even layer on the dough
Sprinkle any fresh herbs and garlic that you like onto the pizza
Lay down your thinly sliced mozzarella
Next, add any veggies that you like. Here, we used fresh tomatoes, sliced, and mushrooms
Top the entire pizza with a sprinkle of Parmesan cheese
Put the pizza into the oven for about 10 minutes, depending on how dark you like your crust
Remove from the oven, slice and serve
enjoy!

Oh, and we made kale salad too


Veggie Lovin' Cauliflower Crust Pizza

1 large head of cauliflower, chopped
2 cups of cheese (we used a yummy Trader Joe's shredded cheese blend)
1 egg
Salt and pepper to taste
A few sprinkles of basil, oregano, thyme, and rosemary (fresh or dried)
1/2 cup tomato sauce
1 zucchini, sliced into rounds
1 cup of mini heirloom or grape tomatoes, halved
1 large roasted red pepper, chopped

ricing!

crust, pre-bake

crust, after baking


veg attack

Preheat your oven to 400 degrees
On your stove, bring one large pot of salted water to boil
Toss in the cauliflower and let it cook until soft (test with a fork, about 8 minutes)
Drain all water from the cauliflower and put into a bowl to cool
Using a food processor or immersion blender, finely chop the cauliflower until a fine consistency ("rice like") is achieved
Mix the egg, cheese, salt, pepper, and spices into the cauliflower
On a well sprayed cooking sheet, spread the cauliflower mixture (it might look like mashed potatoes at this point) out in a thin layer
Bake the crust for about 25 minutes or until it starts to brown
Pull it out and top with sauce, veggies, and cheese
Put the pizza back into the oven and broil for about 5 minutes until the cheese starts to brown
enjoy!

the finished project

To note, this pizza definitely did not keep its pizza consistency so well, but that aside, it was delicious. I would definitely make it again, but perhaps tweak the crust so that it held together better.  I found a ton of recipes online, with lots of great pictures of real pizza-like crust, but we didn't quite get there.

Sunday, March 18, 2012

The great (gluten free) matzah ball challenge

Last weekend, my mom came to visit. I'm very fortunate that my family lives only two hours away from me, and likes to come visit in New York whenever they can. I love spending time with my family, and when they come in for a day, we always have fun. My mom came in to spend the day with me, and with a project in mind. Passover is coming up, and for those of you might not know, on passover Jews eat all kinds of weird food like Matzah. Passover is one of my all time favorite holidays, and I have to say, my mom and I cook a mean seder meal (keep an eye out for a HUGE Passover post at the beginning of April). One of my mom's specialties, that she makes for passover and all year round, is her chicken soup with Matzah balls. Over they years my mom has definitely perfected the taste and texture of these delicious floating dumplings, and everyone loves having her soup as one of the courses at our seder.

This year, my mom is determined to make gluten free matzah balls, for me and my cousin, who also eats gluten free. My mom showed up at my door, shopping bags in hand, and on a mission. We made three different matzah ball recipes and had a taste test. I think that making good matzah balls is hard in general, but good gluten free matzah balls?! Almost impossible. Last year my mom made gf matzah balls from a box mix, and they were pretty disgusting. This year, she's determined to do better. After many hours of mixing, chilling, and cooking, we had a matzah ball taste test to decide which was the best tasting matzah ball. We wanted them to taste like matzah balls and look the part, too. While they were definitely not winners across the board, we found a winner! Enjoy the recipes below, and try them at your own risk. The last recipe is the one that was very yummy, with the most similar flavor and consistency to regular matzah balls. This is the one we'll be making at our seder this year!


Take One

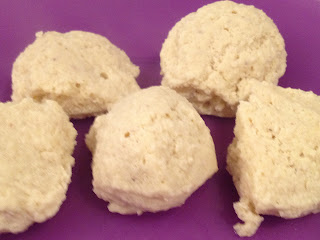
These were much more soup dumplings than matzah balls. If you're looking for balls of mashed potatoes floating in your soup, this recipe is for you. Otherwise, I'd say skip this one.

take one


2 lbs large red potatoes
1 egg
1/4 cup potato starch
2 cups blanched almond flour
Salt and pepper

Bring a large pot of water to boil on the stove, and add the potatoes. Boil the potatoes until they are tender (about 45 minutes) and then drain them
Allow the potatoes to come to room temperature and peel off the skins. Chop the potatoes into large chunks and chill in the fridge until they are cold all the way through
Once cooled, mash the potatoes and get out as many lumps and bumps as possible
Bring another pot of water to boil on your stove
Into the potatoes, mix in the egg, potato starch, almond meal, salt, and pepper
Roll the potato dough into small balls and place them gently into the hot water
The balls will rise to the top of the pot as they cook through
After about 12 minutes, all of the balls should be floating. At this point, remove them from the pot with a slotted spoon and enjoy


Take Two

While this recipe definitely seemed promising, even after adding extra almond flour, the batter almost feel apart. Ultimately the balls just did not come together, and though they cooked better than we thought they would, they were very grainy in texture and did not have great flavor.


take two

4 eggs
2 tsp salt
Pepper to taste
2 cups almond flour

In a bowl, beat the eggs, salt, and pepper for two minutes. Once combined, mix in the almond flour and refrigerate the mixture for 2 hours
Once chilled, bring a large pot of water to boil
Roll the batter into small, 1 inch balls and then drop them into the boiling water
Reduce the heat of the stove, and cover the pot, cooking for 20 minutes
After 20 minutes, take out the balls and enjoy


Take Three

Finally, we got it. While this recipe is close but not perfect, it is tasty, texturally pleasing, and definitely reminds me of Passover. The recipe calls for gluten free matzah, which most grocery stores now carry. The gf matzah is actually delicious, I definitely recommend you buy some! My mom and I will be making these bad boys again for our seder, hopefully you will too! We definitely recommend adding in extra salt, and perhaps some herbs also to elevate the flavor of these.

take three


1 1/2 cup gluten free matzah meal (we used gf matzah crushed very finely, it worked great as a sub!)
4 large eggs, separated
4 tbsp vegetable stock
1 tbsp olive oil
1/2 cup almond flour
salt and pepper

Place egg whites in a mixing bowl and whip until stiff peaks form
In a different bowl, whisk together the egg yolks, stock, and olive oil
Place your matzah sheets in a bag and use a rolling pin to crush to fine crumbs (you could also use a space grinder or food processor that is able to really create a fine crumb)
Fold half of the matzah meal and salt into the egg whites, and then fold in half of the egg yolk mixture. Repeat with the remaining meal and yolks, adding in the almond flour at the end
Refrigerate the batter for 30 minutes
Bring a large pot of water to boil on the stove
Roll the matzah balls into 1 inch balls and drop them into the boiling water
Cover the pot and simmer for 30 minutes before the matzah balls are ready to eat!
enjoy!

Monday, March 12, 2012

birthday cake, gluten free chocolatey goodness


This past week was one of my best friend's birthdays. And lets be honest, who doesn't love birthdays. As you may remember, one of my favorite things about birthdays, is the cake. My roommate from college and I used to make a bee-line for the cake at birthday parties, while everyone else was busy mixing drinks. Who doesn't love an excuse to eat cake?

I'm very lucky to have a wonderful group of girlfriends, dating back to our elementary and middle school days. Flash forward a few years, and I now live with one of my best friends, and one of our other friends (the birthday girl) lives just a short walk away. This weekend two of our other best friends were staying with us in the city as well. We can be a little ridiculous when together, but always have a wonderful time. In addition to buying a fish (hey Beyonce), eating yummy food, cuddling and more, we also celebrated a birthday. Along side a few of our wonderful camp and college friends, we had an amazing weekend.

As I've said before, I believe everyone should have a cake on their birthday, and this was no exception. I definitely get nervous when making a gluten free dessert that is the only dessert at a party. And baking a birthday cake is even more nerve wracking, since its not just a nibble on the side kind of snack--the cake is front and center at the party. This time around, I wanted to make a chocolate cake, knowing my friends would love the chocolate-cream cheese combo. I have to say, it was definitely a success. I think (well, I hope!) the cake was very well received and everyone loved eating it, especially the birthday girl. With the decorating help of my incredibly artistic friends (see pictures below), the cake with certainly fit for a celebration. I'm so happy that I got to spend the weekend with so many people I love. And I will definitely be making this cake again- next time, make sure you get a piece!

happy birthday!!

Chocolate Birthday Cake with Cream Cheese Frosting
1 3/4 cups flour
2 cups sugar
3/4 cups cocoa powder
2 tsp baking soda
1 tsp baking powder
1 tsp salt
1 cup buttermilk, shaken
2 large eggs
1/2 cup veg oil
2 tsp vanilla
1 cup hot coffee
2 ounces semi-sweet chocolate (1/4 cup)

Preheat your oven to 350 degrees
Chop the chocolate, and pour into the coffee, stirring and allowing it to melt
Sift together the flour, sugar, cocoa, baking soda, baking powder, and salt
In another bowl combine the buttermilk, oil, eggs, and vanilla
With your mixer on slow, add the wet ingredients to the dry ingredients
With your mixer still on low add the coffee-chocolate mixture
Pour batter into two square or round baking dishes, prepared with non-stick cooking spray
Bake cakes for 35-40 minutes, switching their positions in the oven (top to bottom, bottom to top, half way through), and cool in pans for 30 minutes


just out of the oven

first layer

second layer


2 sticks of butter, softened
12 oz (3/4 lb) cream cheese, softened
2 tsp vanilla extract
4 cups powdered sugar (a bit more or less, depending on how thick you like your frosting)
Candy and sprinkles to decorate

Whisk together the butter and cream cheese on high, stopping often to scrape down the whisk and sides of the bowl, until well combined 
Add the vanilla and mix to combine
Slowly add in the powdered sugar (watch out, it will be snowing in your kitchen) until your frosting has reached your desired consistency
If your frosting is a bit more liquidy, chill it slightly before spreading on your (completely cooled) cake
enjoy!

delicious.

Sunday, March 11, 2012

something fishy

If you haven't noticed a trend yet, I absolutely love fish. While salmon is a regular in my kitchen, I am pretty much willing to cook with, and eat, any fish that comes my way. Because I don't eat meat, fish is one of my regular go to's, whether eating out or cooking in. I think that a lot of people are afraid of cooking fish; it has a strange consistency, is a little bit smelly sometimes, and can be a little tricky to handle. But, if you give it some spice and some love, I promise you, you'll be cooking fish in no time. It has nice flavor and texture when cooked, and there are so many different kinds to try. Though seemingly intimidating, it is actually relatively simple and quick to cook. Plus, when treated right- fish is incredibly delicious.

A couple of nights a week, I try to have fish. I'd like to say it's because of all of the nutritional value and protein, but really, I'm just a sucker for it. I love experimenting with different recipes, pairing it with various spices and sauces. One of my favorite ways to prepare fish is by crusting it. While I've done a ground almond-bread crumb crusted fish before, I was itching to try out something new. I've always wanted to crust a fish with sliced almonds, so last week I put it to the test. I put together this recipe (with the cooking help of my boyfriend), and let me tell you, it was a tasty success. It looks fancy, but it's really just a few simple steps to a mouth watering dinner. Impress your friends with this one --and try pairing it with this salad for a wonderful weeknight dinner.

dinner is served!

Almond Crusted Snapper with Warm Summer Squash Salad

2 fillets of snapper
1 splash of olive oil
1 egg white, beaten
A pinch of parsley
1/4 tsp salt and pepper
1/4 cup toasted almond slices


egg wash

almond crust

Rinse off the fish and be sure to remove any remaining bones or scales
Beat egg white with parsley, salt and pepper until it is fully combined and starts to get a little frothy (30 seconds with a fork should do the trick)
Soak the fish in the egg wash before topping the top side with almond slices. Press the almonds into the fish so that they stick well to it
Heat a splash of olive oil in a pan over high heat
Place the fish, skin side down in the plan and cook for 4 minutes
Once the fish begins to cook through, flip it over with a spatula and cook for another 4 minutes
Remove from the pan and enjoy!


1 yellow summer squash, cut into thin rounds
4 cups mixed greens
1 cup heirloom tomatoes, cut into quarters
1/8 cup lemon juice
1/8 cup balsamic vinegar
1/4 cup olive oil
1 good squeeze of honey or dijon mustard
Salt and Pepper to taste

Preheat your oven to 325 degrees
Slice your squash into thin rounds
Place them onto a baking sheet that has been sprayed with cooking spray and top with another spritz of cooking spray or a drizzle of olive oil
Sprinkle with salt and pepper
Put your squash into the oven and roast for about 20 minutes or just until they start to become translucent and are not quite browning
In a small bowl, whisk together the lemon juice, vinegar, olive oil, mustard, and salt and pepper
Toss greens, tomatoes, and squash in a large bowl with the salad dressing and enjoy!

Tuesday, March 6, 2012

morning glory

I don't know about you, but I am one of those people who goes to sleep with a smile on my face, thinking about the breakfast that I'm going to be eating the next morning. Plain and simple, I love breakfast. All that stuff about breakfast being the most important meal of the day, I totally eat that up (literally). I love cereal, I love oatmeal, I love pancakes, I LOVE eggs. I'd have breakfast multiple meals a day if there weren't so many other yummy foods out there for me to explore. But to put it simply, I just love breakfast. There is something special about those quiet moments of serenity in the morning that I share with my breakfast, enjoying my food before the craziness of whatever lies ahead in my day. For those of you who don't like breakfast, what is that? I just don't get it. I wake up hungry and ready for breakfast, dream of breakfast in my sleep, and could seriously go for some breakfast right now at 10 o'clock at night.

A challenge that I've faced since I started working is still getting in my breakfast, without interfering too much with my work schedule. In college, I used to always eat a bowl of cereal or some waffles with peanut butter (haven't tried it? you must!) before class. Once I started working, I quickly realized that my mornings are a bit more rushed, and I just wasn't always going to have the time to eat a leisurely breakfast at home. It took a bit of getting used to, but I adjusted my morning schedule and now eat as I check my morning emails (the one time a day my office is actually quiet). After adjusting, the next challenge was figuring what to eat for breakfast. I'm a cereal girl at heart, but cereal in the office was just impractical, and so I turned to oatmeal. Let me tell you, it changed my life. Especially in the fall and now winter, I look forward to that steamy cup of oatmeal at 9 in the morning. With this recipe, I was inspired to take the things I loved about oatmeal, and put them into a delicious baked muffin. 

Muffins are another great quick go to breakfast, but a lot of those you can buy on your way to work from the portable coffee and pastry trucks lining the streets are a bit (okay a lot) more cupcake than muffin. And while I am probably the #1 fan in the cupcake club, I try to start off my day with something a little healthier. This muffin has all of the deliciousness of one of those sugary food cart monstrosities (that frankly look like they ate my muffin), honestly maybe more. They are just the right amount of sweet, and the flavors really all come together nicely. I had some fresh blueberries in my fridge, so I used those for half of the recipe, however you certainly do not have to (or you could add in your favorite fruit or nut). And like all of my baking recipes, just substitute regular flour and remove the xanthum gum if you're baking these without worries of eating gf. I hope that these inspire you and give you a wonderful start to your day as well!


Apple Cinnamon Oat Muffins

1 1/4 cups gf flour
3/4 tsp Xanthum gum
1 1/4 cups gf oats
1 tsp baking powder
1/2 tsp baking soda
1/4 tsp salt
1 tsp cinnamon
¼ tsp nutmeg
1/4 cup firmly packed brown sugar
1 1/4 cup unsweetened applesauce (I used cinnamon)
1/4 cup low-fat buttermilk
1 tsp apple cider vinegar
2 tsp water
2 tbsp canola oil
1 large egg, lightly beaten
3/4 cup blueberries (optional- I did half of mine with and half without)

Preheat your oven to 375
Whisk together flour, xanthum gum, oats, baking powder, and baking soda
Once combined, add salt, cinnamon, and nutmeg to the dry ingredients
With your mixer set to low, slowly add in the brown sugar and applesauce
Once combined, add in buttermilk, vinegar, water, and oil, and mix on medium
Scrape down sides, turn mixer onto medium and add in egg and mix until batter is just combined
If you are adding in blueberries (optional), mix in by hand before scooping into the pan, to avoid blueberries bursting!
Once combined, Scoop out into lined muffin pans, sprayed with a bit of cooking spray
Bake for 15 minutes and enjoy!!

ready for the oven...


ready to be eaten!

a dinner date

While I love baking, I also love cooking dinner. There is nothing more relaxing to me than scouring the racks of my fridge and throwing together something delicious. These days I've been cooking a lot with my friends, or dining for one, as my #1 cooking partner in crime has been tied up in his busy season at work. Lucky for me (though probably luckier for him), my boyfriend just finished up his busy season, and now is free to cook with me again (I mean, I guess we could have cooked dinner at 2am together...but that's a bit too late for me). He loves food almost as much (if not more honestly) than I do, and loves to cook. Making dinner together is one of my favorite things to do, right after eating dinner together. 

On Saturday, after making our usual rounds at the farmer's market, Whole Foods, and Trader Joe's, we ended up at home and ready to cook. Inspired by the delicious looking trout at Whole Foods, our dinner grew from there. We made an awesome broccoli slaw, a specialty that my mom and I have perfected over the years, along side some spiced brown rice. I have to say, it was delicious.


Spiced Trout with Broccoli slaw and Spiced Brown Rice


 1/2 cup short grain brown rice (you can use any variety here, I just like the puffy texture yet nutty flavor of short grain that it gets when cooked)
1/2 cup water
1/2 cup vegetable stock
Salt and Pepper, to taste
1/4 tsp garlic powder
1/4 tsp paprika


Bring ½ cup water and ½ cup vegetable stock to a boil in a small saucepan, before adding in ½ cup short grain brown rice
Cover and turn down to low so that the rice and water are simmering
After 30 minutes (check every so often to ensure that rice is not sticking to the bottom of the pot. If you find that the rice has absorbed all of the liquid, add in more), season rice with salt, pepper, garlic powder, and paprika
Cover and allow all liquid to cook out. Rice should be puffy and soft, but still a bit nutty. Fluff and serve!


1/2 bag broccoli slaw (this stuff is great- kind of like coleslaw, except made of shredded broccoli stems; I like the Trader Joe's brand which also has carrots in the mix)
1/4 cup olive oil
1/4 cup lemon juice
1 tsp agave nectar
2 tsp mustard (I used Dijon, but Honey or any other of your choice would work as well)
A good splash of apple cider vinegar
Salt and Pepper, to taste
1/4 tsp celery salt
1/2 tsp sesame seeds

Pour half a bag of broccoli slaw into a large bowl
In a small bowl combine olive oil, lemon juice, agave nectar, 2 mustard, and a splash of apple cider vinegar
Whisk these together until emulsified, and pour over the slaw
Sprinkle on salt, pepper, celery salt, and sesame seeds
Toss well slaw so that all of the slaw is dressed before covering
Let sit for at least 30 minutes, covered to allow slaw to marinate fully


the seasoned fish


Two fillets of trout
1/2 tsp olive oil
Salt and Pepper, to taste 
1/4 tsp paprika
1/4 tsp celery salt

Rinse off trout fillets, and remove any remaining scales or bones
In keeping with the other spices used, season the trout with salt, pepper, paprika, celery salt
Heat oil in a pan on high before placing fish skin side down into the pan (the fish should sizzle once it hits the pan)
Cook the fish, skin side down for 2-3 minutes before flipping the fish over, and turning the heat down to medium to finish cooking
The fish should take about 5 minutes total to cook through (trout is a pretty thin fish, though the thicker the fish, the longer it will take to cook)
Once fish is no longer translucent and has a nice white flesh, with a slightly browned crust, take it out of the pan
Enjoy!

did someone say dinner?

Sunday, March 4, 2012

the hunt for the perfect cookie

There is just nothing like a warm, gooey chocolate cookie to put a smile on my face. And I'm not talking Chips Ahoy. I've never been so into store bought chocolate chip cookies, but put some homemade yummies in front of my face, and I will go to town. I love a sweet and salty cookie, with rich buttery flavor, and delicious chocolate chunks to top off a meal (or you know, just in the afternoon or something). 

I've had my fair share of mouth watering chocolate chip cookies over the years, but recently, I've made it a personal goal to make a deliciously perfect (or as close to perfect as possible) chocolate chip cookie. Not as easy as it looks. Some cookies are too hard, and some fall apart. Lets be honest, who doesn't want a cookie that's slightly undercooked chewy on the inside with a slightly crispy outside? To make matters worse, as my gluten free friends out there can tell you, gluten free baking is no picnic --the finicky flour, the confusing xanthum gum, the tricky ratios...the list goes on. Needless to say, I've certainly burdened myself with a weighty task. 

This batch of cookies was incredibly delicious. The flavors were spot on, and they had a surprisingly wonderful texture, which is not always achieved with gluten free baking. They were a hit with my friends, who assured me that they "didn't even taste gluten free!" (Success or what?!) The two and a half dozen that I made were eaten within about 48 hours, leaving only the memories (and some beautiful pictures) of these tasty treats.

Though these cookies were delicious, the quest for the perfect cookie continues. There are definitely things that can be improved in this recipe, and I assure you, this will not be the last you hear from the beloved chocolate chip cookie. Over the next few months, you will have the pleasure of reading about my ongoing hunt for perfection. I have to say though, I'm off to a delicious start. These cookies got rave reviews, but they're only going to get better from here.

look at that cookie

Chocolate Chip Walnut Cookies

1/2 cup sugar
1/2 cup brown sugar
8 tablespoons unsalted butter, cold, cut into cubes
1 large egg
1 teaspoon vanilla extract
1/2 teaspoon baking soda
1 1/4 cups gf flour
¾ tsp xanthum gum
1/4 teaspoon salt
1 1/2 cups semisweet chocolate chips
1 cup walnuts toasted and chopped


buttery, chocolatey dough
fresh out of the oven

the perfect bite.

Preheat your oven to 300 degrees
Cut the cold butter into small 1/4 inch cubes
Beat together both the regular and brown sugars with the butter until well mixed and smooth
With your mixer on medium speed, mix in the egg, vanilla, and baking soda
In a separate bowl, whisk together the flour, xanthum gum, and salt
Once combined, add slowly into the wet ingredients in the mixer
Toast walnuts in your oven or on your stove for a few minutes until toasted nicely
Toss the chocolate chips and walnuts into the batter and mix (you might want to mix by hand, or on low, as the mixer may break up the chips and walnuts down)
With your hands, roll dough into 1 inch balls and place 3-4 inches apart on a parchment lined cookie sheet
Bake the cookies for 17 minutes or until they just start to brown. If using two cookie sheets at once, switch the cookies from the top shelf to the bottom (and vice versa) so that they cook evenly
enjoy- and be sure to snag one right out of the oven, it will be totally worth it!!

spaghetti? look again!

Squash is one of my all time favorite foods --acorn, butternut, delicata, I love them all. They are amazingly simple to cook with, and absolutely delicious, not to mention very good for you. Though squash can be intimidating, once you try cooking with one for the first time, you'll see that it is certainly easier than you think. Plus, you'll get amazingly yummy results. I tend to roast my squash in the oven, though there are certainly other ways to cook it.

Squash is very abundant in fall and early winter, but this time of the year, they are definitely few and far between at the market. The other day, when I was picking up some produce, I came across a spaghetti squash. I was seriously excited about the find, its been months since I've seen one of these little puppies, and I absolutely LOVE spaghetti squash. Spaghetti squash is very similar to its other squash cousins, except for the fact that it does an amazing thing when it is cooked. Most squash gets soft, sweet, and starchy (almost the consistency of a potato) when it is roasted.

Spaghetti squash turns out a bit differently than the traditional roasted squash. It gets its name from the spaghetti like strands that easily come away from the sides of the squash after it has been cooked. The result is delicious. If you're looking for a healthy, gluten free alternative to your every day pasta dish, you should definitely give this a try. I promise it is easy to make, and delicious to eat.

dinner time.

Spaghetti Squash with Garlic Broccoli and Mushrooms

1 medium sized spaghetti squash
1 tsp olive oil
salt, pepper, garlic powder to taste

starting to shred
look at those strands of squash

spaghettied!

Preheat your oven to 400 degrees
Cut your Spaghetti squash in half with a sharp knife (Be patient, it is hard to cut through- picture carving a pumpkin)
Drizzle your squash halves with olive oil, and sprinkle with salt, pepper, garlic and any other herbs you might desire
Place the squash face down in a baking dish, and let it roast for about 45 minutes to 1 hour, depending on how large/thick your squash is. You'll know it is done when you can stick your fork easily through the skin side, and when your squash strands shred away easily from the skin of the Squash (if you want your strands to be softer, roast for longer)
Once your squash is done, pull it out of the oven and flip the two halves over
Using a fork, begin to shred the meat of the squash away from the walls of the squash --the strands should come off very easily (if they do not, the squash is likely not done yet)
Shred out the inside of the squash, and top with whatever you like*


1 cup broccoli florets
1/2 cup mushrooms, sliced
2 scallions, both white and green parts, chopped
1/2 tsp olive oil
1 clove of garlic, chopped
Salt, pepper
Sprinkle of additional desired herbs (I chose oregano for this one)

To top your spaghetti squash, heat olive oil on medium high in a pan
Once the oil is hot, add the broccoli florets and garlic, cooking for 4 minutes before adding the sliced mushroom and scallions, cooking for another 4 or so minutes
Season as you desire, using salt, pepper, and herbs
Once the veggies are done, sprinkle the squash with parmesan cheese (or cheese of your choice) and top with your veggies
enjoy!!

delicious!
*Any pasta topping would work well here; I've topped it with blistered roasted tomatoes, sauteed veggies, home made pesto, and more. I definitely encourage you to get creative here!